NOMAD – leading the development of a scientific data sharing platform (2017 – now)
I joined the NOMAD project [ ] in 2017. At this point, it's many project partners had already created a isolated services based on incompatible technology stacks. In my role as architect and lead developer, I had to remove a lot of technical dept, introduce rigor engineering practices, and consolidate everything into a uniform sustainable software solution based on modern web technologies. As a single experienced software developer among many scientists, I learned to effectively communicate complex technical issues across domain language barriers and tutored non computer scientist to become better developers.
React, Material-UI, D3
Javascript, React, Recoil, Material-UI, D3
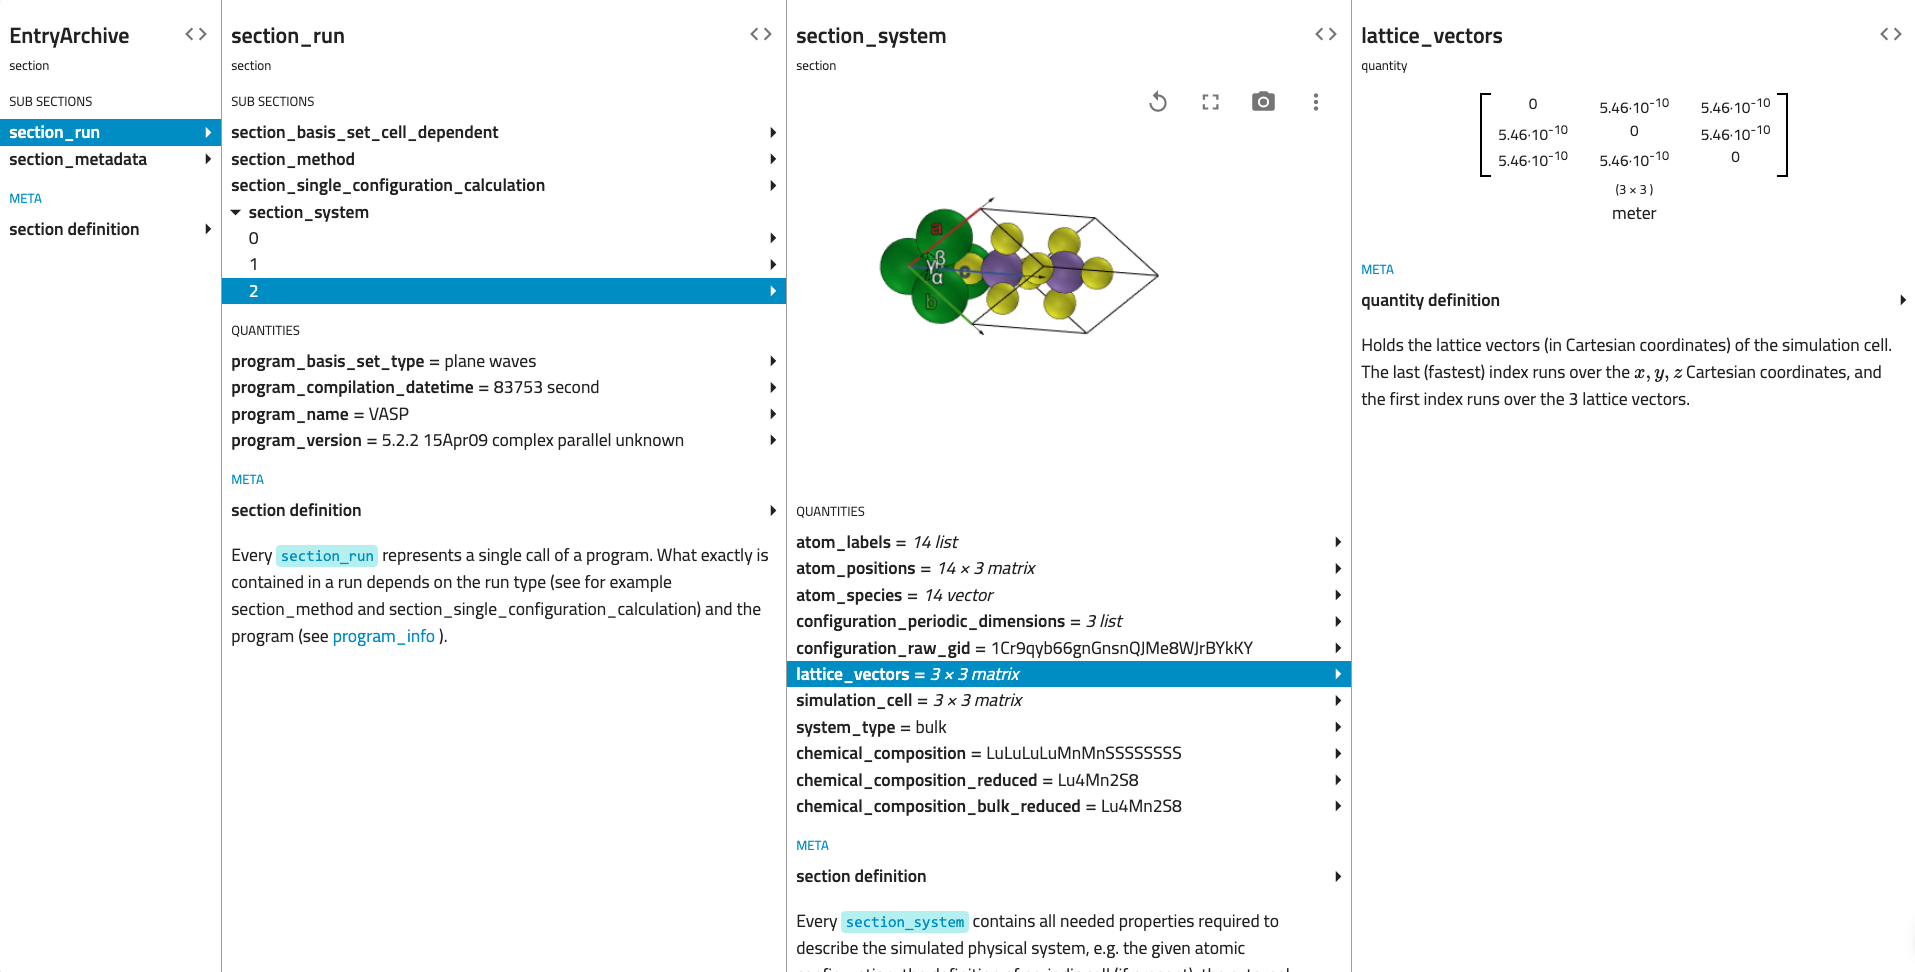
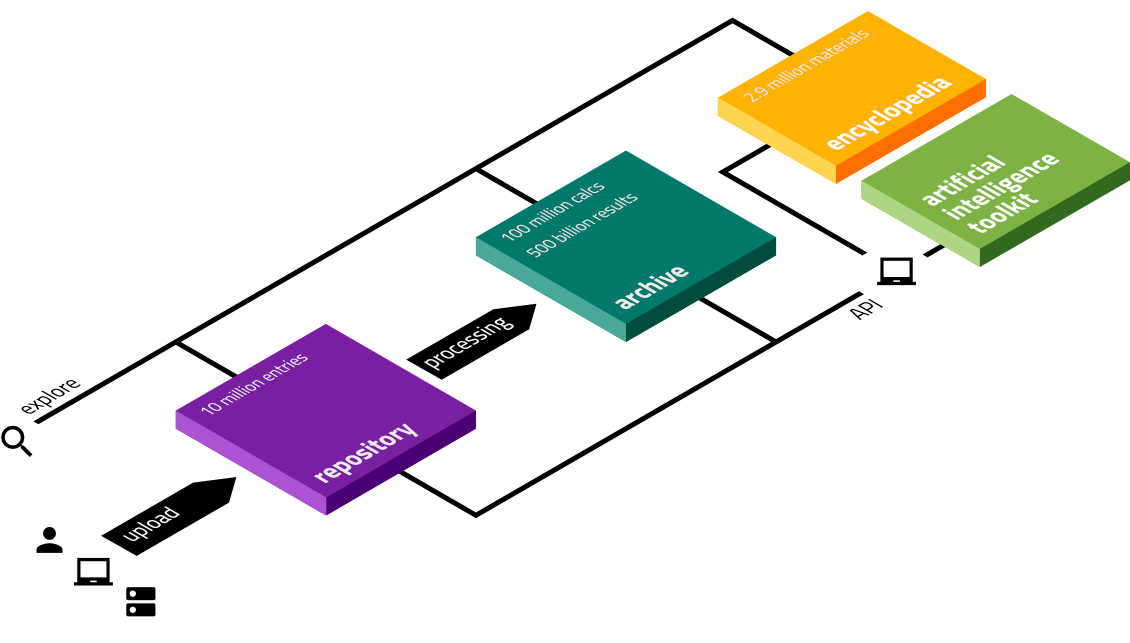
REST API for accessing the >500 billion different research data
Python, REST, Flask, FastAPI, Elasticsearch, MongoDB, Keycloak, RabbitMQ/Celery, GPFS
Running in a cluster
With high and unpredictable workloads imposed by large amounts of data and complex classification and normalization of scientific data, we have to run NOMAD in a cluster with tools that allow to deploy and scale all components with ease. Deployment scripts based on docker-compose or helm allow us to easily setup and maintain NOMAD installations on Max Planck's HPC compute facility in Garching and at external sites alike.
NOMAD improves constantly with contributions from many developers. Test driven development, CI/CD, and GIT is the only way to maintain its constantly growing codebase.
Docker, Docker-compose, Kubernetes, Helm, GitLAB-CI, Pytest, TDD